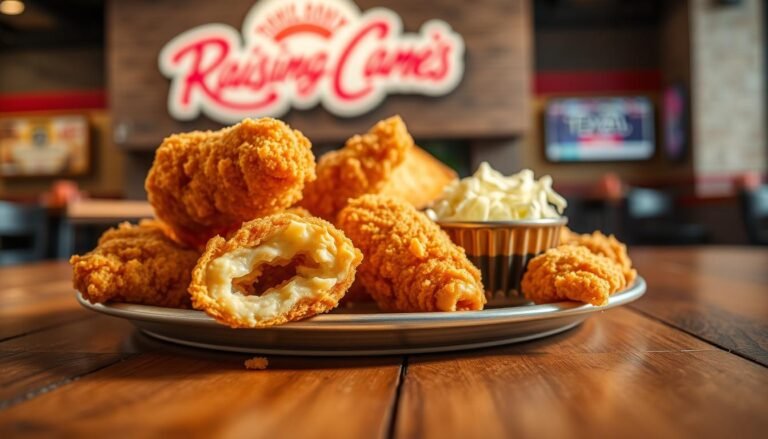
How to Make Raising Cane’s Chicken
We tested this copycat recipe until the flavor matched the original. Our goal was simple: give families a reliable fried chicken option they can prepare at home without the drive-thru wait.
This version serves 4 to 6 and takes about 2 hours and 45 minutes total. It uses 2 pounds of tenders and 1.5 cups of buttermilk for a tender, juicy result. The buttermilk marinade works for roughly 2 hours and helps the breading cling during frying.
We walk you through oil temperature, frying time, and a simple sauce that pairs with every bite. By following our steps, you control ingredient quality and seasoning like pepper and salt for consistent results.
This recipe brings the signature taste of raising cane into your kitchen. Read on for precise measures and timing so you can serve hot, crispy tenders that taste like the restaurant version.
Essential Ingredients for Authentic Flavor
Getting the right amounts of flour, spices, and buttermilk sets up success. We gather fresh chicken tenders and measure carefully so every bite matches the familiar profile.
For the breading, combine 2.5 cups of all-purpose flour with 0.5 cup of cornstarch. Add 5 teaspoons kosher salt, 1.5 teaspoons paprika, 1 teaspoon garlic powder, and 0.5 teaspoon onion powder. Ground black pepper finishes the dry mix.
Prepare the marinade in a large bowl by whisking one large egg with 1.5 cups buttermilk and 2 teaspoons salt. Submerge the tenders and chill for the recommended time. This step yields juicy, well seasoned pieces ready for breading.

- Sauce: 0.75 cup mayonnaise, 3 tablespoons ketchup, 1 tablespoon Worcestershire sauce for a tangy dip.
- Oil: pick a neutral oil with a high smoke point for frying.
- Quality: real buttermilk and fresh tenders improve the final texture and flavor.
| Component | Measure | Purpose |
|---|---|---|
| Flour + Cornstarch | 2.5 cups + 0.5 cup | Light, crispy crust |
| Marinade | 1 egg + 1.5 cups buttermilk | Tenderize and season |
| Sauce | 0.75 cup mayo + ketchup | Signature dipping |
How to Make Raising Cane’s Chicken at Home
Selecting quality tenders and prepping them properly sets the stage for crisp results. Start with fresh chicken and remove the tendon by sliding each strip over a fork before any brine.
The Importance of Quality Tenders
Use tenders of similar size so the cook time stays even. Pat the pieces dry and season lightly with salt, garlic powder, and onion powder.
Marinate in buttermilk in the fridge for at least 2 hours. Overnight works if we have the time. You can store marinated pieces up to 24 hours for deeper flavor.
Preparing Your Workspace
Set a station with a large bowl for the flour mixture and a pot of oil for frying.
Place a wire rack over a baking sheet in the center. It keeps fried chicken tenders draining and crisp while we finish batches.
- Double-dredge: flour mixture, dip in marinade, then press in flour again for a thick coating.
- Fry in small batches of 3–4 tenders so oil temperature holds steady.
- Keep sauce nearby for quick serving.
| Item | Purpose | Notes |
|---|---|---|
| Wire rack | Drain and rest | Set over a baking sheet |
| Bowl with flour mixture | First and final dredge | Includes flour, cornstarch, salt, spices |
| Pot of oil | Fry tenders | Neutral oil, high smoke point |

Mastering the Buttermilk Marinade and Breading
A well-balanced marinade and a firm breading technique make crisp tenders every time. We focus on a simple bowl recipe that primes the meat and a flour mixture built for crunch.

Techniques for a Crispy Coating
Whisk 1 egg, 1.5 cups buttermilk, 2 teaspoons salt, and ground black pepper in a large bowl. Submerge the chicken for the recommended time so the marinade adds moisture and flavor.
For the breading, mix 2.5 cups flour, 0.5 cup cornstarch, 1.5 teaspoons paprika, 1 teaspoon garlic powder, and a pinch of onion powder. Pat dry pieces first, then press the flour mixture firmly onto each strip.
Use the double-dip: coat in flour, return to the bowl, then dredge again. This builds flaky layers that resist oil and create the signature coating like raising cane chicken.
- Heat oil in a heavy pot to 350F and monitor with a thermometer.
- Season the flour mixture with salt and black pepper for balanced taste.
- Work in small batches so the temperature holds and the coating stays crisp.
| Component | Measure | Purpose |
|---|---|---|
| Marinade (bowl) | 1 egg + 1.5 cups buttermilk | Tenderize and add moisture |
| Flour mixture | 2.5 cups flour + 0.5 cup cornstarch | Light, flaky coating |
| Frying oil (pot) | Heat to 350F | Fast seal for crunchy crust |
Tips for Achieving the Perfect Golden Fry
A few simple timing and draining tricks help every piece finish golden and crunchy.
Fry in small batches so the oil holds heat. Each batch usually needs 3–4 minutes; aim for an internal temp of 165F. We watch the time and test with a meat thermometer for safety and consistency.
Avoid overcrowding the pot. Crowds lower oil temperature and yield soggy coating rather than crisp fried chicken.
After frying, blot briefly with paper towels, then move pieces onto a wire rack set over a baking sheet. Using a rack prevents steaming and keeps the bottom crunchy.
Look for a deep golden color — that shows the flour mixture has properly crisped. If pieces brown too fast, lower the heat a notch and keep an eye on the thermometer.
- Work in batches for steady oil heat and even frying.
- Use a bowl near the stove for quick transfers between dredge and oil.
- Rest on the rack so the sauce can be served hot without ruining the coating.
| Step | Time / Temp | Purpose |
|---|---|---|
| Fry per batch | 3–4 minutes / 350°F | Seal crust, cook through to 165F |
| Drain | Immediately | Remove excess oil, avoid steaming |
| Rest on rack | 2–3 minutes | Keep coating crisp, ready for sauce |
Crafting the Signature Dipping Sauce
This version of the cane sauce is quick but true to the flavor we want with our tenders.
Combine 0.75 cup mayonnaise, 3 tablespoons ketchup, and 1 tablespoon Worcestershire sauce in a medium bowl. Add 1 teaspoon garlic powder, 0.5 teaspoon onion powder, 0.5 teaspoon salt, and 0.75 teaspoon black pepper. Stir until the mixture is smooth.
Cover and chill the sauce in the fridge for at least one hour. Cold resting helps flavors meld and gives the sauce a rounder, deeper profile. Store any leftovers in an airtight container for up to 3 days.
Because the restaurant keeps its recipe secret, our blend aims for the closest match. Serve this sauce with warm chicken tenders for the best result.
- We recommend making the cane sauce first so it chills while you finish frying.
- The mayo and Worcestershire create a tangy base that complements crispy coating and flour-seasoned breading.
| Ingredient | Measure | Role |
|---|---|---|
| Mayonnaise | 0.75 cup | Creamy base |
| Ketchup | 3 tbsp | Sweet acidity |
| Worcestershire sauce | 1 tbsp | Umami lift |
| Spices | Garlic powder, onion powder, salt, black pepper | Savory balance |
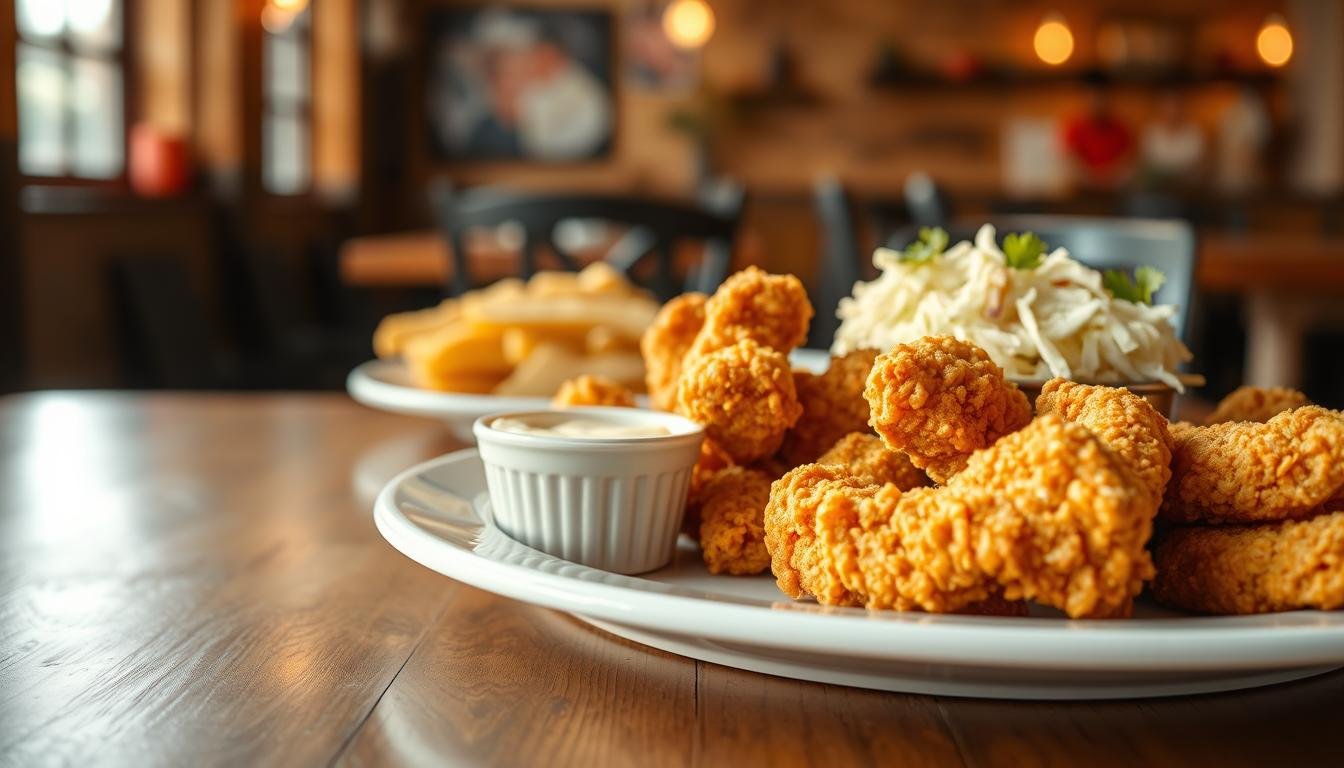
Storing and Reheating Your Leftover Tenders
Good packing and a quick air-fryer reheat bring crispness back fast. Store cooled tenders in an airtight container in the fridge for up to 3–4 days.
If you need longer life, remove air and freeze in a freezer-safe bag for up to 4 months. Keep the cane sauce in its own container; mayonnaise, ketchup and Worcestershire sauce do best chilled and separate.
When reheating, use an air fryer for a few minutes at medium heat until the internal temperature is safe. During the initial frying, a wire rack and paper towels help drain oil and preserve the coating for better leftovers.
We recommend reheating small batches so the coating crisps and the garlic and pepper notes stay bright. Enjoy your cane chicken at home with fries or a fresh salad.